Build Front-end for Platformatic REST API
Platformatic apps expose REST APIs that provide provide CRUD (Create, Read, Update, Delete) functionality for each entity (see the Introduction to the REST API documentation for more information on the REST API) by default.
In this guide, you will learn how to create a new Platformatic guide with Watt, Frontend Client, add a frontend to consume your Platformatic REST API.
Create a Platformatic DB Application
To start the Watt creator wizard, run the appropriate command for your package manager in your terminal:
- npm
- yarn
- pnpm
npm create wattpm
yarn create wattpm
pnpm create wattpm
This interactive command-line tool will guide you through setting up a new Watt project. For this guide, please choose the following options:
Hello YOURNAME, welcome to Watt 3.0.0!
? Where would you like to create your project? .
✔ Installing @platformatic/runtime@^3.0.0 using npm ...
? Which kind of application do you want to create? @platformatic/db
✔ Installing @platformatic/db@^3.0.0 using npm ...
? What is the name of the application? db
? What is the connection string? sqlite://./db.sqlite
? Do you want to create default migrations? yes
? Do you want to use TypeScript? no
? Do you want to create another application? no
? What port do you want to use? 3042
After completing the wizard, your Watt application will be ready in the specified folder. This includes example migration files, plugin scripts, routes, and tests within your application directory.
If the wizard does not handle dependency installation, ensure to run npm/yarn/pnpm install command manually.
wattpm sets up workspaces for the selected package manager. Running a manual installation with a different package manager may cause issues or trigger warnings.
Every Watt application uses the "Movie" demo entity and includes the corresponding table, migrations, and REST API to create, read, update, and delete movies.
Launch your application with the command below:
npm run dev
Your Platformatic app should be at the http://127.0.0.1:3042/ URL.
Create a Gateway Application
We're now going to use Platformatic Gateway compose our database and our frontend applications:
npm create wattpm
And then let's enter the following settings:
Hello YOURNAME, welcome to Watt 3.0.0!
Using existing configuration ...
? Which kind of application do you want to create? @platformatic/gateway
? What is the name of the application? gateway
? Do you want to use TypeScript? no
? Do you want to create another application? no
? Which application should be exposed? gateway
Create a Front-end Application
Refer to the Scaffolding Your First Vite Project documentation to create a new front-end application, and call it "rest-api-frontend".
Please note Vite is suggested only for practical reasons, Platformatic Watt supports Astro, Remix, Next.js, Vite, and NestJS frameworks.
Run the command:
- React
- Vue.js
npm create vite@latest -- web/frontend --template react
npm create vite@latest -- web/frontend --template vue-ts
Run the command below to add watt.json file to your frontend application:
npx wattpm-utils import
This will also install the required dependencies. The command will output:
[13:06:10.996] INFO (42432): Application next is using Next.js. Adding @platformatic/next to its package.json dependencies.
[13:06:10.998] INFO (42432): Installing dependencies for the project using npm ...
[13:06:12.119] INFO (42432): Installing dependencies for the application gateway using npm ...
[13:06:13.092] INFO (42432): Installing dependencies for the application node using npm ...
[13:06:14.310] INFO (42432): Installing dependencies for the application next using npm ...
Add your frontend id and DB application to your watt.json file in your web/gateway application:
{
  "$schema": "https://schemas.platformatic.dev/@platformatic/gateway/3.0.0.json",
  "gateway": {
    "applications": [
      {
        "id": "db",
        "openapi": {
          "url": "/documentation/json",
          "prefix": "/db"
        }
      },
      {
        "id": "frontend" // Frontend ID for Vite applications
      }
    ],
    "refreshTimeout": 1000
  },
  "watch": true
}
Add a Frontend Client for REST API
To consume REST APIs in your Watt application. run the command to use massimo for exposing a client for your remote OpenAPI server, the client uses fetch and runs on the browser.
npx massimo-cli --frontend http://0.0.0.0:3042 --no-full --name client -f web/frontend/src/client
The Massimo CLI will generate client.mjs, client-types.d.ts, client.openapi.json. Refer to the massimo documentation to learn more about the Client and CLI.
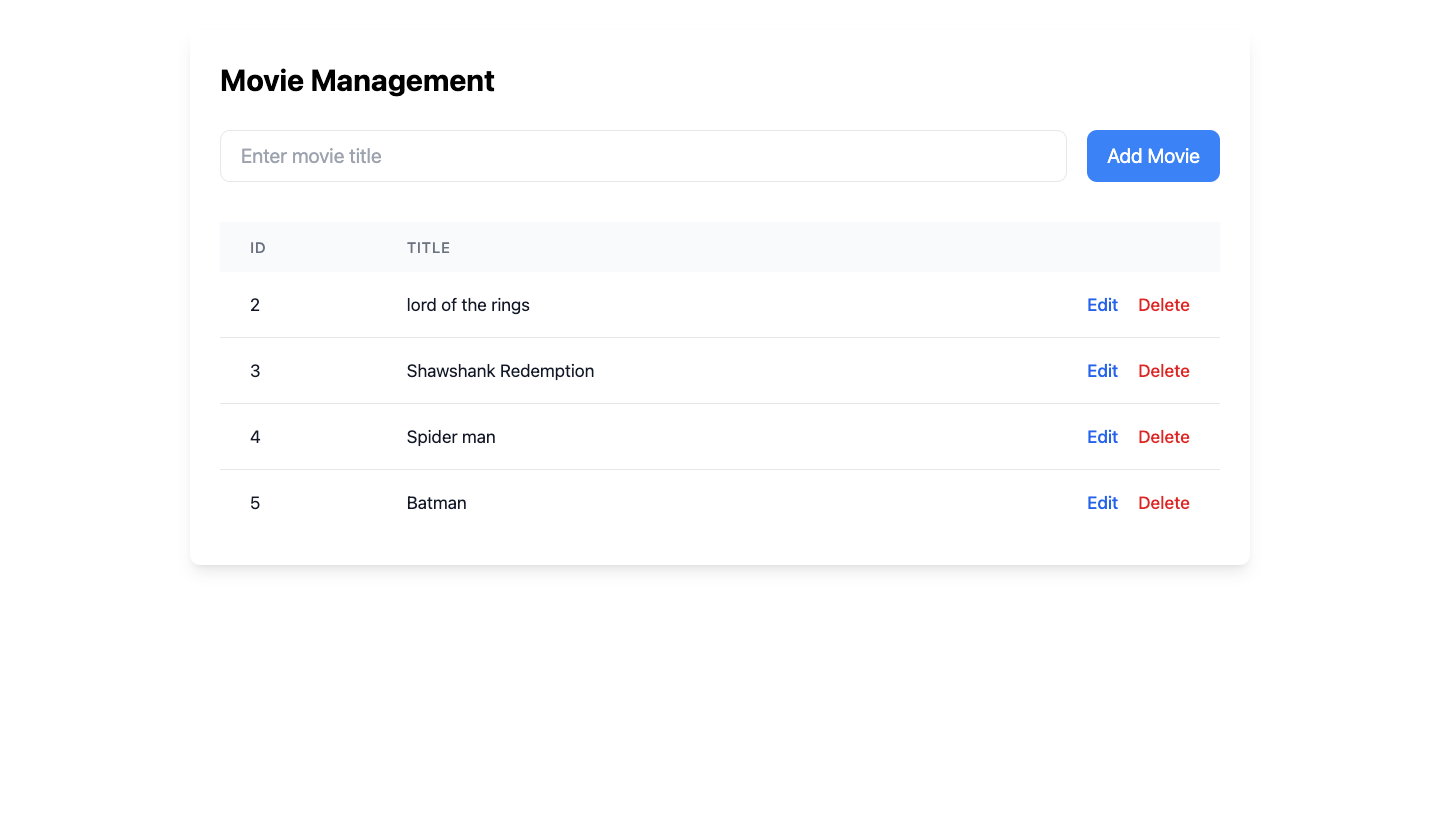
React component for CRUD operations
In this section, you’ll build a React component for CRUD operations using the autogenerated client code provided by Platformatic. The code showcases a MovieManager.jsx file that manages movies in a database. You will implement features to create, read, update, and delete movies.
// web/frontend/src/MoviesManager.jsx

import { useState, useEffect } from 'react'
import { setBaseUrl, dbGetMovies, dbCreateMovie, dbUpdateMovie, dbDeleteMovies } from './client/client.mjs'

// Set the base URL for the API client
setBaseUrl(window.location.origin) // Or your specific API base URL

export default function MovieManager () {
  const [movies, setMovies] = useState([])
  const [newMovie, setNewMovie] = useState({ title: '' })
  const [editMovie, setEditMovie] = useState(null)
  const [showEditModal, setShowEditModal] = useState(false)

  useEffect(() => {
    fetchMovies()
  }, [])

  const fetchMovies = async () => {
    try {
      const response = await dbGetMovies({})
      setMovies(response)
    } catch (error) {
      console.error('Error fetching movies:', error)
    }
  }

  const handleCreateMovie = async e => {
    e.preventDefault()
    try {
      await dbCreateMovie(newMovie)
      setNewMovie({ title: '' })
      fetchMovies()
    } catch (error) {
      console.error('Error creating movie:', error)
    }
  }

  const handleEditMovie = async e => {
    e.preventDefault()
    try {
      await dbUpdateMovie(editMovie)
      setShowEditModal(false)
      setEditMovie(null)
      fetchMovies()
    } catch (error) {
      console.error('Error updating movie:', error)
    }
  }

  const handleDeleteMovie = async id => {
    try {
      await dbDeleteMovies({ id })
      fetchMovies()
    } catch (error) {
      console.error('Error deleting movie:', error)
    }
  }

  return (
    <div className="p-6 max-w-4xl mx-auto">
      <div className="bg-white rounded-lg shadow-lg p-6">
        <h1 className="text-2xl font-bold mb-6">Movie Management</h1>

        {/* Create Movie Form */}
        <form onSubmit={handleCreateMovie} className="mb-8 flex gap-4">
          <input
            type="text"
            placeholder="Enter movie title"
            value={newMovie.title}
            onChange={e => setNewMovie({ title: e.target.value })}
            className="flex-1 px-4 py-2 border rounded-lg focus:outline-none focus:ring-2 focus:ring-blue-500"
          />
          <button
            type="submit"
            className="px-4 py-2 bg-blue-500 text-white rounded-lg hover:bg-blue-600 focus:outline-none focus:ring-2 focus:ring-blue-500"
          >
            Add Movie
          </button>
        </form>

        {/* Movies Table */}
        <div className="overflow-x-auto">
          <table className="w-full">
            <thead className="bg-gray-50">
              <tr>
                <th className="px-6 py-3 text-left text-xs font-medium text-gray-500 uppercase tracking-wider">ID</th>
                <th className="px-6 py-3 text-left text-xs font-medium text-gray-500 uppercase tracking-wider">
                  Title
                </th>
                <th className="px-6 py-3 text-right text-xs font-medium text-gray-500 uppercase tracking-wider">
                  Actions
                </th>
              </tr>
            </thead>
            <tbody className="bg-white divide-y divide-gray-200">
              {movies.map(movie => (
                <tr key={movie.id}>
                  <td className="px-6 py-4 whitespace-nowrap text-sm text-gray-900">{movie.id}</td>
                  <td className="px-6 py-4 whitespace-nowrap text-sm text-gray-900">{movie.title}</td>
                  <td className="px-6 py-4 whitespace-nowrap text-right text-sm font-medium">
                    <button
                      onClick={() => {
                        setEditMovie(movie)
                        setShowEditModal(true)
                      }}
                      className="text-blue-600 hover:text-blue-900 mr-4"
                    >
                      Edit
                    </button>
                    <button onClick={() => handleDeleteMovie(movie.id)} className="text-red-600 hover:text-red-900">
                      Delete
                    </button>
                  </td>
                </tr>
              ))}
            </tbody>
          </table>
        </div>

        {/* Edit Modal */}
        {showEditModal && (
          <div className="fixed inset-0 bg-black bg-opacity-50 flex items-center justify-center p-4">
            <div className="bg-white rounded-lg p-6 w-full max-w-md">
              <h2 className="text-xl font-bold mb-4">Edit Movie</h2>
              <form onSubmit={handleEditMovie}>
                <input
                  type="text"
                  value={editMovie?.title || ''}
                  onChange={e => setEditMovie({ ...editMovie, title: e.target.value })}
                  className="w-full px-4 py-2 mb-4 border rounded-lg focus:outline-none focus:ring-2 focus:ring-blue-500"
                />
                <div className="flex justify-end gap-4">
                  <button
                    type="button"
                    onClick={() => setShowEditModal(false)}
                    className="px-4 py-2 border rounded-lg hover:bg-gray-100"
                  >
                    Cancel
                  </button>
                  <button type="submit" className="px-4 py-2 bg-blue-500 text-white rounded-lg hover:bg-blue-600">
                    Save Changes
                  </button>
                </div>
              </form>
            </div>
          </div>
        )}
      </div>
    </div>
  )
}
This component handles all the CRUD operations for managing movies by interacting with the autogenerated client functions (dbGetMovies, dbCreateMovie, etc.) from your Platformatic API.
Rendering in App.jsx
To include this component in your app, import it into your App.jsx file:
import MoviesManager from './MoviesManager'
import './App.css'

export default function App () {
  return (
    <div>
      <MoviesManager />
    </div>
  )
}
The styling for the MoviesManager.jsx file uses Tailwind CSS. See the tailwind documentation on how to install and set it up.
Start your Server
In the root of your project directory, run the command:
npm run dev
Your application is now up and running on http://127.0.0.1:3042/frontend