Fullstack Guide
Welcome to your next steps with Platformatic services such as Platformatic Watt, Platformatic DB with SQLite, Platformatic Client and the Platformatic Composer.
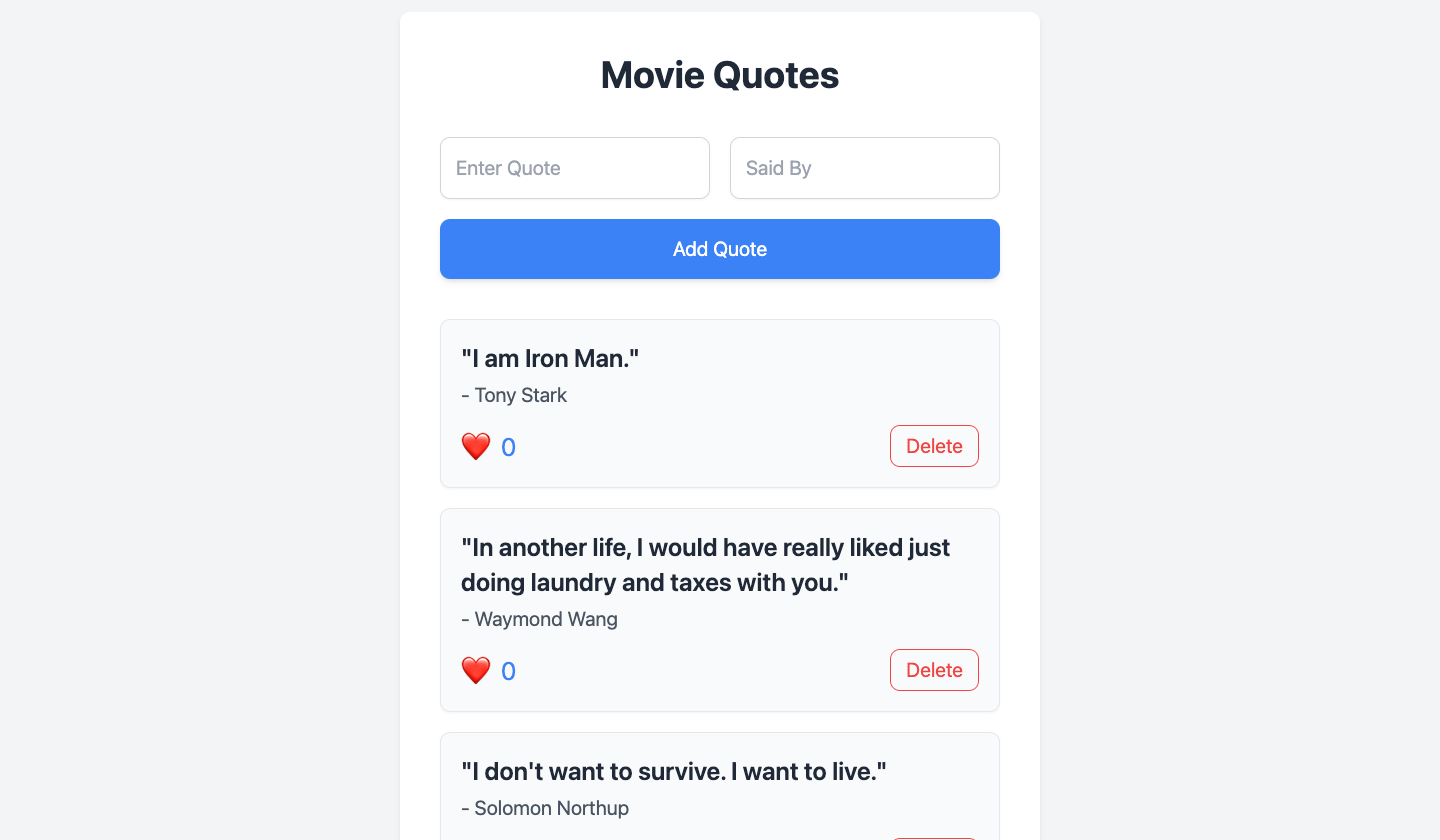
In this tutorial, you will build a movie quotes application, where users can add, like and delete quotes from popular movies. This guide will help you setup and run your first full-stack Platformatic application.
While this guide uses SQLite, Platformatic DB also supports PostgreSQL, MySQL, and MariaDB. For more details on database compatibility, see the Platformatic DB documentation.
Prerequisites
Before starting, ensure you have the following installed:
- Node.js (v18.8.0 or higher)
- npm (v7 or higher)
- A code editor, (e.g., Visual Studio Code)
Create a Platformatic Watt Application
mkdir my-app
cd my-app
npx wattpm@latest init
Which will output:
Need to install the following packages:
[email protected]
Ok to proceed? (y) y

[15:48:14.722] DONE (40803): Created a wattpm application in /Users/tmp/my-app.
Then, run npm install to install all the dependencies.
Add Platformatic DB service
To start the Platformatic creator wizard, run the appropriate command for your package manager in your terminal:
- npm
- yarn
- pnpm
npm create platformatic@latest
yarn create platformatic
pnpm create platformatic@latest
This interactive command-line tool will guide you through setting up a new Platformatic project. For this guide, please choose the following options:
- Where would you like to create your project?  => .
- Which kind of project do you want to create?  => @platformatic/db
- What is the name of the service?              => (generated-randomly), e.g. legal-soup
- What is the connection string?                => sqlite://./db.sqlite
- Do you want to create default migrations?     => Yes
- Do you want to create another service?        => No
- Do you want to use TypeScript?                => No
- What port do you want to use?                 => 3042
- Do you want to init the git repository?       => No
After completing the wizard, your Platformatic application will be ready in the specified folder. This includes example migration files, plugin scripts, routes, and tests within your service directory.
If the wizard does not handle dependency installation, ensure to run npm/yarn/pnpm install command manually:
Start Your API Server
Run the following command in your project directory to start your API server:
- npm
- yarn
- pnpm
npm run dev
yarn run dev
pnpm run dev
Your API server is now live! 🌟 It will automatically serve REST and GraphQL interfaces for your SQL database.
Create a Database Schema
Navigate to the migrations directory within the services folder of your project directory. This folder contains your database migration files:
001.do.sql: contains the SQL statements for creating database objects.001.undo.sql: contains the SQL statements to remove database objects.
For the movie quote application, you will need a schema configuration for the movie table and likes. Add the schema configuration below in the 001.do.sql file to do this:
CREATE TABLE quotes (
  id INTEGER PRIMARY KEY,
  quote TEXT NOT NULL,
  said_by VARCHAR(255) NOT NULL,
  created_at DATETIME DEFAULT CURRENT_TIMESTAMP
);
This SQL query creates a database table called "quotes" that stores: a unique ID number, the quote's text, who said it, and when it was added to the database.
Create a new file 002.do.sql in the same folder directory and add a schema below:
CREATE TABLE movies (
  id INTEGER PRIMARY KEY,
  name TEXT NOT NULL UNIQUE
);

ALTER TABLE quotes ADD COLUMN movie_id INTEGER DEFAULT 0 REFERENCES movies(id);
This schema stores the movie IDs and the movie names, adds a new column that links each movie quote to a specific movie in the movies table.
Now create a 003.do.sql and add the schema configuration below:
ALTER TABLE quotes ADD COLUMN likes INTEGER default 0;
Create a Like Quotes Plugin
You will add a Fastify plugin for adding likes to a quote. Create a new file like-quote.js in the plugins directory of your DB service.
/// <reference path="../global.d.ts" />
'use strict'

const S = require("fluent-json-schema");

/** @param {import('fastify').FastifyInstance} app */
module.exports = async function plugin(app) {
  async function incrementQuoteLikes(id) {
    const { db, sql } = app.platformatic;
    const result = await db.query(sql`
      UPDATE quotes SET likes = likes + 1 WHERE id=${id} RETURNING *
    `);
    return result;
  }

  const schema = {
    params: S.object().prop("id", app.getSchema("Quote").properties.id),
  };

  // Check if the route already exists
  if (!app.hasRoute({ method: 'POST', url: '/quotes/:id/like' })) {
    app.post("/quotes/:id/like", { schema }, async function (request, reply) {
      return { likes: await incrementQuoteLikes(request.params.id) };
    });
  }
};
Here, you've created a API endpoint that lets users like a quote in the database. incrementQuoteLikes function updates the database by adding 1 to the quote's likes count. The fluent-json-schema checks that the quote ID is valid.
Apply Schema Migrations
In your web/db directory, run the command below for database migrations
npx $ platformatic db migrations apply
Add a Composer service
Platformatic Composer integrates different microservices into a single API for more efficient management. For the movie quotes application, you will use the Platformatic composer to aggregate the DB service, and your frontend application.
Inside web folder, let's create a new Platformatic Composer
npx create-platformatic
This will output:
Need to install the following packages:
[email protected]
Ok to proceed? (y) y

 Hello Fortune Ikechi, welcome to Platformatic 2.14.0
? Where would you like to create your project? .
✔ Installing @platformatic/[email protected]...
 Using existing configuration
? Which kind of project do you want to create? @platformatic/composer
✔ Installing @platformatic/[email protected]...
? What is the name of the service? composer
? Do you want to create another service? no
? Do you want to use TypeScript? no
[16:06:50] INFO: /Users/tmp/my-app/.env written!
[16:06:50] INFO: /Users/tmp/my-app/.env.sample written!
[16:06:50] INFO: /Users/tmp/my-app/web/composer/package.json written!
[16:06:50] INFO: /Users/tmp/my-app/web/composer/platformatic.json written!
[16:06:50] INFO: /Users/tmp/my-app/web/composer/.gitignore written!
[16:06:50] INFO: /Users/tmp/my-app/web/composer/global.d.ts written!
[16:06:50] INFO: /Users/tmp/my-app/web/composer/README.md written!
? Do you want to init the git repository? no
✔ Installing dependencies...
[16:06:52] INFO: Project created successfully, executing post-install actions...
[16:06:52] INFO: You are all set! Run `npm start` to start your project.
Add services to composer
In your web/composer directory, select the platformatic.json file and add the DB service to your composer:
{
  "$schema": "https://schemas.platformatic.dev/@platformatic/composer/2.5.5.json",
  "composer": {
    "services": [
      {
        "id": "db",
        "openapi": {
          "url": "/documentation/json"
        }
      }
    ],
    "refreshTimeout": 1000
  },


  "watch": true
}
Add a React frontend for Movie Quotes App
Next steps is to add a React (vite) frontend for the movie quotes app. Run the command to create a React.js application:
npm create vite@latest frontend -- --template react
which will output:
> npx
> create-vite frontend --template react


Scaffolding project in /Users/fortuneikechi/Desktop/frontend...

Done. Now run:

  cd frontend
  npm install
  npm run dev
Setting Up the Platformatic Frontend Client
To kickstart the project, in your web/frontend/src directory, run the command to create a Platformatic frontend client for your remote server:
npx platformatic client --frontend http://0.0.0.0:3042 --name next-client web/frontend/src
This command will generate a Platformatic frontend client in the specified web/frontend/src folder, which allows a more efficient communication between your frontend and Platformatic DB and composer service.
Installed Required Packages
To style the application, install the following CSS packages:
npm install tailwindcss postcss autoprefixer
Set up Tailwind CSS by creating the necessary configuration files:
npx tailwindcss init -p
Ensure your tailwind.config.js points to the correct paths for your components:
module.exports = {
  content: ['./src/**/*.{js,jsx,ts,tsx}', './public/index.html'],
  theme: {
    extend: {},
  },
  plugins: [],
};
Building the QuoteList Component
The core of your frontend lies in the src/components/QuoteList.jsx file. Here's how it works:
- Data Management:
- Fetches quotes from the API.
- Handles creating new quotes, liking existing ones, and deleting quotes.
- State Handling:
- Manages loading, error states, and real-time updates for user interactions.
Here’s the complete QuoteList component:
import { useState, useEffect } from 'react';
import { setBaseUrl, dbGetQuotes, dbCreateQuote, dbDeleteQuotes, postQuotesIdLike } from '../frontend-client/frontend-client.mjs';

// Set the base URL for the API client
setBaseUrl(window.location.origin); // Or your specific API base URL

const QuoteList = () => {
  const [quotes, setQuotes] = useState([]);
  const [error, setError] = useState(null);
  const [newQuote, setNewQuote] = useState({ quote: '', saidBy: '' });
  const [isLoading, setIsLoading] = useState(true);

  useEffect(() => {
    getQuotes();
  }, []);

  const getQuotes = async () => {
    try {
      setIsLoading(true);
      const fetchedQuotes = await dbGetQuotes({});
      setQuotes(fetchedQuotes);
      setError(null);
    } catch (error) {
      console.error('Error fetching quotes:', error);
      setError('Failed to fetch quotes');
    } finally {
      setIsLoading(false);
    }
  };

  const handleLike = async (id) => {
    try {
      await postQuotesIdLike({ id });
      getQuotes();
    } catch (error) {
      console.error('Error liking quote:', error);
      setError('Failed to like quote');
    }
  };

  const handleCreate = async (e) => {
    e.preventDefault();
    if (!newQuote.quote || !newQuote.saidBy) {
      setError('Please fill in both quote and author');
      return;
    }
    try {
      await dbCreateQuote(newQuote);
      setNewQuote({ quote: '', saidBy: '' });
      setError(null);
      getQuotes();
    } catch (error) {
      console.error('Error creating quote:', error);
      setError('Failed to create quote');
    }
  };

  const handleDelete = async (id) => {
    try {
      await dbDeleteQuotes({ id });
      getQuotes();
    } catch (error) {
      console.error('Error deleting quote:', error);
      setError('Failed to delete quote');
    }
  };

  return (
    <div className="min-h-screen flex flex-col items-center justify-center bg-gray-100 py-8">
      <div className="bg-white shadow-md rounded-lg p-8 max-w-lg w-full">
        <h1 className="text-3xl font-bold mb-8 text-center text-gray-800">Movie Quotes</h1>

        {error && (
          <div className="mb-4 p-4 bg-red-100 border border-red-400 text-red-700 rounded-lg">
            {error}
          </div>
        )}

        <form onSubmit={handleCreate} className="mb-8">
          <div className="flex flex-col sm:flex-row gap-4 mb-4">
            <input
              type="text"
              placeholder="Enter Quote"
              value={newQuote.quote}
              onChange={(e) => setNewQuote({ ...newQuote, quote: e.target.value })}
              className="w-full p-3 border border-gray-300 rounded-lg shadow-sm focus:ring-2 focus:ring-blue-500 focus:border-transparent"
            />
            <input
              type="text"
              placeholder="Said By"
              value={newQuote.saidBy}
              onChange={(e) => setNewQuote({ ...newQuote, saidBy: e.target.value })}
              className="w-full p-3 border border-gray-300 rounded-lg shadow-sm focus:ring-2 focus:ring-blue-500 focus:border-transparent"
            />
          </div>
          <button
            type="submit"
            className="w-full bg-blue-500 text-white py-3 rounded-lg hover:bg-blue-600 transition duration-200 shadow-md"
          >
            Add Quote
          </button>
        </form>

        {isLoading ? (
          <p className="text-center text-gray-500 text-lg">Loading quotes...</p>
        ) : quotes.length === 0 ? (
          <p className="text-center text-gray-500 text-lg">No quotes available</p>
        ) : (
          <div className="space-y-4">
            {quotes.map((quote) => (
              <div
                key={quote.id}
                className="bg-gray-50 p-4 rounded-lg shadow-sm border border-gray-200"
              >
                <p className="text-xl font-semibold text-gray-800 mb-1">"{quote.quote}"</p>
                <p className="text-md text-gray-600 mb-3">- {quote.saidBy}</p>
                <div className="flex justify-between items-center">
                  <button
                    onClick={() => handleLike(quote.id)}
                    className="flex items-center space-x-2 text-blue-500 hover:text-blue-600"
                  >
                    <span className="text-2xl">❤️</span>
                    <span className="text-xl">{quote.likes || 0}</span>
                  </button>
                  <button
                    onClick={() => handleDelete(quote.id)}
                    className="text-red-500 hover:text-red-600 px-3 py-1 border border-red-500 rounded-lg hover:bg-red-50 transition duration-200"
                  >
                    Delete
                  </button>
                </div>
              </div>
            ))}
          </div>
        )}
      </div>
    </div>
  );
};

export default QuoteList;
Integrating the QuoteList Component
Update your main app file src/App.jsx to include the QuoteList component:
import QuoteList from './components/QuoteList';

function App() {
  return (
    <div className="App">
      <QuoteList />
    </div>
  );
}

export default App;
Add frontend to Composer
In your web/composer directory, add the frontend id to your composer platformatic.json file, update it as shown below:
{
  "$schema": "https://schemas.platformatic.dev/@platformatic/composer/2.5.5.json",
  "composer": {
    "services": [
      {
        "id": "db",
        "openapi": {
          "url": "/documentation/json"
        }
      },
      {
        "id": "frontend"
      }
    ],
    "refreshTimeout": 1000
  },


  "watch": true
}
Start Your API Server
In your project directory, use the Platformatic CLI to start your API server:
npm run dev
This will:
- Automatically map your SQL database and React frontend to REST using the composer
- Start the Platformatic Watt server.
Your Platformatic application is now up and running! 🌟